Hey there, I’m Jake—been selling industrial valves for 12 years, and I’ve lost count of how many times I’ve gotten a frantic call from a plant tech or maintenance manager who just fumbled an actuator install on a ball valve. One time, a guy in Texas had to yank a whole assembly off a pipeline because he skipped a single torque check on the adapter, and by the time the parts showed up, they’d lost 4 hours of production on a water treatment line. That’s the kind of avoidable headache we’re here to fix. I’ve walked hundreds of teams through this process (mostly our own ball valves, obviously—we engineer ours to work seamlessly with every major actuator brand), so today I’m breaking down the exact, step-by-step way to install an actuator on a ball valve the right way, no shortcuts, no guesswork. Ball Valve
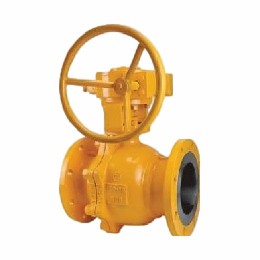
First, let’s start with the pre-install prep—this is where most mistakes happen before you even touch a wrench, I promise. You wouldn’t bolt a fridge to a flimsy wall or a ladder to a uneven floor, right? Same logic applies here. First, match the actuator to your ball valve. I see way too many guys grab the first actuator that fits the valve bolt pattern, but that’s a quick path to disaster. Your ball valve needs a actuator rated for both the valve’s full torque requirement and the specific application. If it’s a water line that only opens/closes occasionally, a smaller, lighter actuator works, but if it’s on a steam line or a system with backpressure that slams the valve shut, you need a quarter-turn actuator with enough breakout torque—this is the force needed to get the ball moving from a fully seated position, not just running torque when it’s moving. Our ball valves come with a spec sheet that lists exact torque ranges per size and application, so always cross-check that with the actuator manufacturer’s data sheet, not a generic online chart.
Next, get all your tools and parts organized, and do a visual check of every single component. You’ll need a torque wrench (not a regular socket wrench—accuracy matters here), a set of Allen wrenches (most quarter-turn actuators use M5 or M6 bolts for mounting), a small digital caliper to verify alignment, a soft mallet (never a steel hammer—you’ll dent the valve handle or actuator housing), and a clean rag. Also, pull our ball valve out of storage and inspect it: make sure the stem isn’t bent, the seat isn’t damaged, and the valve is fully closed (that’s critical—you never want the ball moving mid-install). And don’t skip checking the actuator itself: inspect its mounting flange for cracks, make sure the drive pin (the part that connects the actuator’s output to the valve stem) is the correct size, and double-check that the actuator’s torque adjustment is set to the correct range for your valve. A common rookie move here is to grab a drive pin that’s too small— it can strip under pressure, so always check the diameter of your valve stem’s flat section (the part that connects to the actuator) and match it to the actuator’s drive pin. If you’re not sure, just send us a photo of the valve stem or actuator model, and our tech team will point you to the right part—we get these questions every single week, no charge for advice.
Now, the actual install starts with alignment. This is the make-or-break step, so don’t rush it. First, make sure your ball valve is in the fully closed position. On most of our ball valves, that means turning the valve handle clockwise until it stops, and making sure the indicator dot on the top of the valve lines up with the “closed” mark molded into the valve body. If you’re using an electric or pneumatic actuator, you need to set it to its closed position too—most actuators have a small adjustment screw or a dial to set the home position, and 9 times out of 10, you should set it to closed before mounting. Now, here’s the alignment trick I learned from a old line worker back in 2015: when you lower the actuator onto the valve stem and mounting flange, don’t force it into place. If the bolt holes don’t line up perfectly, twist the actuator housing a tiny bit (no more than 15 degrees, max) instead of prying. Forcing it will bend the drive pin or strip the bolt threads, and that’s a part you’ll have to order mid-install, holding up your whole project. Once the actuator sits flush against the valve flange, take your caliper and double-check that the drive pin is fully seated in the valve stem’s flat notch. A lot of people assume it’s in just because it’s sitting, but a quick wiggle with your finger will tell you—if there’s any play, it’s not seated. That play will cause the actuator to slip when it’s running, turning your precision valve into a paperweight.
Next, tighten the mounting bolts—using a torque wrench, no exceptions. I can’t stress this enough. Every ball valve and actuator has a specific torque specification for mounting bolts, and under-tightening is just as bad as over-tightening. Under-tightened bolts will vibrate loose during operation (especially on vibrating pipelines, like those at a mine or a grain elevator) and cause the actuator to shift. Over-tightened bolts will crack the valve flange or the actuator’s mounting base, which is a lot harder to fix than a loose bolt. For our standard ball valves paired with quarter-turn actuators, the M6 mounting bolts usually require a torque of 12 to 15 Nm (about 9 to 11 lb-ft), but always check the spec sheet that comes with your valve and actuator. A quick pro tip: tighten the bolts in a crisscross pattern, not in a circle. That applies even tension across the flange, preventing warping. Tighten one bolt halfway, then the one opposite it, then the next, until you get to the full torque spec for each. That’s how you get a secure, even mount without stressing any one part.
Now, the critical step most techs skip: torque calibration. This is why so many actuators fail prematurely—they’re installed, but the torque isn’t matched to the valve’s actual needs. Once the actuator is mounted, you need to test it to make sure it moves the valve smoothly, and set its torque limit so it doesn’t over-tighten or over-open the ball. First, disconnect the power or air supply to the actuator for manual testing. Use your soft mallet to lightly tap the end of the valve handle (if you’re working on a manually operable valve for test purposes) to move it through the full 90-degree quarter-turn range. There should be no sticking, no grinding, and no excessive resistance. If it feels stiff, double-check your alignment—chances are the drive pin is slightly off, or the actuator housing is catching the valve body. Next, reconnect the actuator and run it through a full close-open-close cycle. As it moves, listen for any unusual noises (grinding, clicking, rattling) that would indicate a misalignment or loose bolt. If it runs smoothly, you need to calibrate the torque switch on the actuator. For electric actuators, this is usually done by turning a small adjustment dial until the actuator stops just as it reaches the fully closed and fully open positions. For pneumatic actuators, it’s adjusting the air pressure supply to match your valve’s required torque. On our ball valves, we design them to handle a maximum of 80% of the actuator’s rated torque, so never calibrate the actuator to reach its full torque limit—you’ll risk damaging the valve seat. I had a customer in Oregon do this a couple of months ago; he cranked the torque all the way up, and the valve seat cracked in half, spilling 500 gallons of chemical before the whole thing was shut down. That’s a $10,000 mistake that cost him 2 days of downtime, all because he skipped the torque calibration step.
After calibration, do a final inspection and add any necessary safety components. This sounds like a small step, but it’s non-negotiable. First, double-check all mounting bolts are tight—run your torque wrench over each one one more time to confirm. Then, add a valve position indicator if you don’t have one already. Most actuators come with a small plastic indicator that shows whether the valve is open or closed, but if yours doesn’t, we can supply a custom one that matches our ball valves. This lets you confirm the valve position at a glance, without having to go all the way to the actuator. Finally, add a lockout/tagout (LOTO) device if the valve is on a system that requires lockout for maintenance. This is just a good safety practice, and it’s required in most industrial facilities by OSHA standards. A lot of customers ask if we include LOTO devices with our ball valve and actuator assemblies, and we offer them as an optional add-on at no extra charge if you order a full kit from us.
Now, let’s talk about common pitfalls we see all the time, so you can avoid them. First, don’t use a generic adapter from a hardware store. We’ve had customers grab a random adapter from a local supply shop that didn’t fit their valve stem correctly, leading to a slip mid-cycle. Our ball valves are engineered to work with adapters that are precision-machined to fit our stems, so when you order an actuator through us, we’ll send the exact adapter needed, no guesswork. Second, never install an actuator on a hot valve. If you’re working on a line that’s been operating, let it cool down completely before touching anything—heat can warp the valve stem or the actuator housing, leading to alignment issues. Third, document everything. Write down the torque values you used for mounting bolts, the actuator’s calibrated torque settings, and the valve position on your maintenance log. That way, when it comes time to replace the actuator or perform maintenance, you’ll have all the info you need without having to re-calibrate from scratch.
If you’re someone who’s tired of dealing with misaligned actuators, broken seats, and avoidable downtime, we can help. We design all our ball valves to pair seamlessly with every major actuator brand, and our tech team is available 7 days a week to answer questions, send custom specs, or even walk you through an install over a live video call. We supply ball valves for every industry, from water treatment and agriculture to oil and gas and pharmaceutical manufacturing, so we know exactly what your application needs. Whether you’re replacing an old valve and actuator assembly or building a new pipeline, we can provide you with high-quality, durable ball valves that make actuator install straightforward and reliable.

Ready to get the right parts and support for your project? Reach out to our team for more details on our ball valves and compatible actuators, and we’ll help you pick the perfect solution for your needs.
Ball Valve References:
- Industrial Valves: Actuation and Selection, 2nd Edition.
- API Standard 6A, Specification for Wellhead and Christmas Tree Equipment.
- ISA-75.06.01, Actuator Requirements for Control Valves.
Xiongxiang Valve Group Co., Ltd.
As one of the most professional ball valve manufacturers and suppliers in China, we’re featured by quality products and good price. Please rest assured to wholesale cheap ball valve for sale here from our factory. Contact us for more details.
Address: Building 1, No.306, 12th Binhai Road, Jinkai District, Wenzhou City, Zhejiang Province, China
E-mail: info@xiongxiangvalve.com.cn
WebSite: https://www.steelvalvegroup.com/
