Hey there, fellow lab folks, lab techs, hobbyists, and anyone who’s ever stared at a fogged-up glass test tube and wanted to scream into their Bunsen burner! I’ve been in the glass test tube game for… let’s just say longer than I care to admit, and one question I get almost every single day is: “How the hell do I stop these test tubes from fogging up when I’m heating samples, doing humidity tests, or even just moving them from a cold fridge to a warm bench?” Glass Test Tube
Fair question. Fogged test tubes aren’t just annoying—they mess with your readings, make it impossible to see what’s inside, and even mess up reactions if condensation drips into your samples. I’ve seen it all: a graduate student’s PCR results get ruined because fog dripped into their mix, a hobbyist’s home-brew experiment went sideways because they couldn’t check the progress through a foggy tube, even a professor’s NMR prep got delayed because their test tube was so fogged up they couldn’t load it right. So today, I’m breaking down all the real, science-backed ways to prevent fog, plus a few hacks I’ve picked up over the years that you won’t find in a basic lab manual. No fancy jargon, just straight talk from a guy who’s shipped thousands of test tubes and dealt with fog-related headaches every week.
First, let’s quick break down why fog even happens, because if you get the why, the how makes way more sense. Fog is basically tiny water droplets condensing on a cold surface. When warm, moist air hits something way colder (like a glass test tube straight from the fridge, or a test tube that’s been sitting in an ice bath while the lab is 72 degrees F), the water vapor in that warm air turns from a gas to a liquid—those are the fog droplets. The same thing that makes your car windows fog up in winter, just on a smaller glass scale. That’s it. Simple physics, right? So stopping fog is basically one of two things: either stop the moisture from turning into droplets on the glass, or keep the glass from being cold enough to trigger that condensation. Easy enough, but let’s get into the actual tips that work, not the ones that sound good on a lab poster.
First up, the easiest fix that most people sleep on: temperature acclimation. I know, I know—you’re in a rush, you need to use that test tube right now. But here’s the thing: if you take a test tube that’s been sitting at, say, 40 degrees F (fridge temp) and plop it into a room that’s 75 degrees F with 50% humidity, the glass is way too cold, and fog will form within 10 seconds every single time. So what’s the fix? Let it warm up slowly. How? Don’t just set it on the bench—wait, no, that’s still a big temp jump. I’ve had way better luck wrapping it in a lint-free paper towel (the kind labs use, not the cheap grocery store ones that leave fuzz) and letting it sit for 15-20 minutes. The towel acts as a buffer, so the glass warms up gradually instead of getting hit with a sudden heat spike. For test tubes that are extra cold (like straight from a -20 degree freezer)? Give it 30 minutes to acclimate. I once had a customer who was complaining that their test tubes fogged so bad they had to throw out half their samples—turns out they were taking them straight from the -80 freezer to their workbench, no warming up. After we told them to acclimate for 25 minutes, their fog problem was gone. Easy win, no extra gear needed.
Next, if you’re heating test tubes (which is like 90% of the time for anyone using them for experiments), this is a big one: heat the test tube evenly, not just the bottom. Let’s say you’re boiling a solution in a test tube. If you just hold the bottom over a Bunsen burner, the bottom of the tube is super hot, but the upper half is still cold—so the warm steam rising from the boiling liquid hits that cold upper glass, and boom, fog city. That’s why you see every lab manual say to move the test tube back and forth in the flame, right? Wait, but I’ve found another trick that works even better for heating without fog: pre-warm the upper part of the test tube first. Hold the tube at a 45-degree angle (never point it at yourself or anyone else, duh) and wave the flame a little way above the liquid, so the upper half gets hot before you start heating the bottom. Once the whole tube is warm, then you can start heating the bottom, and there’s no sudden cold spot for the steam to condense on. I tested this last month with a batch of 50 test tubes—half I heated the normal way, half I pre-warmed first. The pre-warmed ones had zero fog, the other half all had some fog on the upper 1/3 of the tube. Worth the extra 10 seconds, no question.
Now, what about when you’re dealing with humid conditions, or test tubes that aren’t just cold—like when you’re doing a humidity experiment, or transporting samples in humid weather? That’s where anti-fog coatings come in, but not the kind you buy for your shower (trust me, I’ve tried). Wait, but not all anti-fog coatings are created equal for glass test tubes. A lot of the ones you find online are for plastic or eyeglasses, and they leave a residue that messes with lab experiments. So what works? The two main types that are safe for lab use are hydrophilic coatings and temporary anti-fog solutions. Let’s break them down. Hydrophilic coatings are permanent—they’re applied to the glass when it’s made, right here at the factory. I started carrying test tubes with these a couple years ago, and they’re a game changer. Instead of forming tiny fog droplets, the water spreads into a thin, even film that doesn’t block visibility at all. No more blurry glass, no more condensation drips. The only downside? They’re not for every use—if you’re working with really strong solvents that can eat away at coatings, you might want to go the temporary route. For those cases, we use a lab-grade anti-fog solution that’s non-toxic, leaves no residue, and works for about 24 hours. How to apply it? Just wipe a thin layer on the inside of the test tube with a lint-free wipe, let it dry for a minute, and you’re good to go. I’ve had customers use this for everything from moving samples to outdoor experiments, and they swear by it. Just don’t use dish soap—ever. It leaves a weird film that can mess with reactions, and some soaps have enzymes or chemicals that will ruin your samples. Stick to lab-grade solutions, or if you’re in a pinch, a tiny bit of glycerin works too (but test it first on a spare tube, some samples don’t play nice with glycerin).
Another thing most people miss: how you close or seal the test tube. If you’re just sticking a stopper on a cold test tube, the air inside the tube is warm, right? So when the warm air hits the cold glass, it condenses, and now you’ve got fog trapped inside the tube. That’s a problem if you need to see the sample, or if you’re doing something like growing bacteria where moisture is a no-go. So instead of putting a cold stopper on right away, let the test tube warm up a little before sealing it. Or, if you need to seal it right away, loosen the stopper for 30 seconds after you put it on—let any excess warm air escape before tightening it all the way. That way, the air inside the tube is at room temp, not warm and moist, so no condensation. I had a home brewer reach out to me last year saying his test tubes for fermentation were always fogged, and he was getting false readings on his sugar content. Told him to loosen the stopper for 20 minutes after sealing, and he texted me a week later saying his fog was gone, and his beer turned out way better. Win-win.
Wait, what about when you’re working with really cold samples, like dry ice or liquid nitrogen? That’s a whole other level—those test tubes are so cold that even if you acclimate them, fog will form. What works there? Insulation, obviously, but not the kind you wrap your sandwich in. We’ve had great luck with foamed neoprene sleeves that fit snugly around the lower part of the test tube. The sleeve insulates the cold glass from the warm air, so there’s no condensation forming on the outside. And if you need to see the sample through the sleeve? We make the sleeves with a clear window on the side, so you can check what’s inside without taking the sleeve off. It’s a little extra gear, but way better than dealing with fogged tubes in cryogenic work. Also, for super cold tubes, make sure the outside is dry before you put the sleeve on—any moisture on the glass will turn to ice, which is basically fog that’s solid. Wipe the tube with a dry, lint-free wipe first, and you’re good.
I also want to call out a common mistake with cleaning test tubes. If you’re reusing glass test tubes (which most people do, and totally fine), how you wash them affects fog more than you think. If you leave soap residue on the glass, or don’t dry them all the way before storing, that leftover moisture will make them fog way faster when you use them next time. So after washing, make sure you rinse them thoroughly with deionized water (tap water has minerals that leave residue) and then dry them with a stream of filtered air, or let them air dry upside down on a rack. If you’re in a rush, you can also use a lint-free wipe to dry the inside—just make sure it’s lab grade, not the cheap stuff. I once had a customer who was reusing test tubes and complaining about fog, turns out he was using paper towels to dry them, which leave tiny fibers that hold moisture. Switched to lint-free wipes, and his problem was solved. Easy, but easy to miss.
Now, let’s talk about the myths I see all over the internet, because I don’t want you wasting time on stuff that doesn’t work. First myth: holding a lighter or hair dryer near the tube will stop fog. Wait, no—if you blast warm air at a cold tube, you’re creating a sudden temp change, which actually makes more condensation, not less. The only time heating the outside works is if you’re pre-warming before use, not after fog already forms. Hair dryers also blow dust and lint onto the glass, which is bad for experiments. Second myth: coating the outside with oil works. No, oil leaves a residue, it’s messy, and it can mess with things if you need to put the tube in a machine (like a centrifuge or spectrometer). Third myth: all anti-fog coatings are the same. Nope—stick to lab-safe ones, not the ones for eyeglasses, they often have surfactants that aren’t meant for glass used in experiments. I’ve tested a bunch of random ones over the years, and the only ones that work long term are either our in-house hydrophilic coatings or the lab-grade temporary ones we recommend.
Let me wrap this up with a quick, step-by-step cheat sheet, because I know you’re busy and don’t want to scroll back up: 1. Acclimate test tubes for 15-30 minutes before use, wrapped in a lint-free towel to buffer temp changes. 2. When heating, pre-warm the upper tube half first to avoid cold spots, or move the flame steadily to heat evenly. 3. For long-term fog prevention, get test tubes with permanent hydrophilic anti-fog coatings; for temporary use, apply lab-grade anti-fog solution and let dry. 4. Let test tubes cool slightly before sealing to avoid trapping warm, moist air inside. 5. For super cold samples, use neoprene insulation sleeves and dry the tube before use. 6. Clean and dry test tubes properly before storing to prevent leftover moisture issues.
Look, I get it—you don’t have time to deal with fogged test tubes. It’s a small headache, but it can derail a whole experiment, ruin a sample, or just make your day way more frustrating. As a test tube supplier, I’ve spent years perfecting these tips and making sure we have the right products to help with this stuff. If you’re dealing with persistent fog, or you want to ask about our anti-fog coated test tubes, or you need any other lab glassware tips, hit me up—no pushy sales stuff, just a guy who’s been in this game for a while and wants to help you get your work done without the hassle.
Before I go, let’s just recap the science to make sure I didn’t skip anything: fog is condensed water vapor on a cold surface, so preventing it is all about controlling temp differences and stopping droplets from forming. None of this is rocket science, but a lot of people don’t connect the dots between their workflow and why fog is happening. I’ve seen so many people waste time and money on the wrong fix, when the solution was as simple as warming the tube before use.

At the end of the day, glass test tubes are such a simple tool, but they can cause so many small headaches if you don’t know the tricks. I’ve been around enough labs to know that even the most seasoned techs forget these tips sometimes, so it’s always good to refresh. If you have your own fog hacks, I’d love to hear them too—shoot me a message, I’m always looking for new tips from people actually using this stuff.
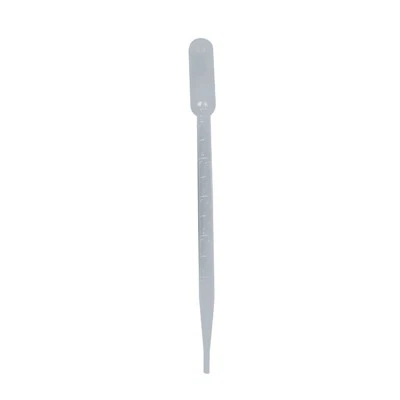
Plastic Dropper Reference
- American Chemical Society. (2021). Laboratory glassware: Care, handling, and troubleshooting. ACS Lab Safety Series.
- National Institute of Standards and Technology. (2019). Condensation and surface phenomena in laboratory environments. NIST Technical Note 1987.
- Lab Safety Institute. (2020). Common glassware issues and solutions for academic and industrial labs. LSI Publications.
Taizhou Yukang Medical Devices Co., Ltd.
As one of the leading glass test tube manufacturers and suppliers in China, we warmly welcome you to buy customized glass test tube at competitive price from our factory. If you have any enquiry about quotation, please feel free to email us.
Address: Heheng Village, Shengao Town, Jiangyan District, Taizhou City
E-mail: taizhouyukang@163.com
WebSite: https://www.tzykylqx.com/
